Welcome to the creation of an artistic, eye-popping and (most importantly) totally unique centerpiece – The Funky Paint Dipped Pine Cones. This is not just a decor, it’s a conversation starter! It’s guaranteed that no one else will have this in their living room.
A Burst of Color for Your Living Room! ????
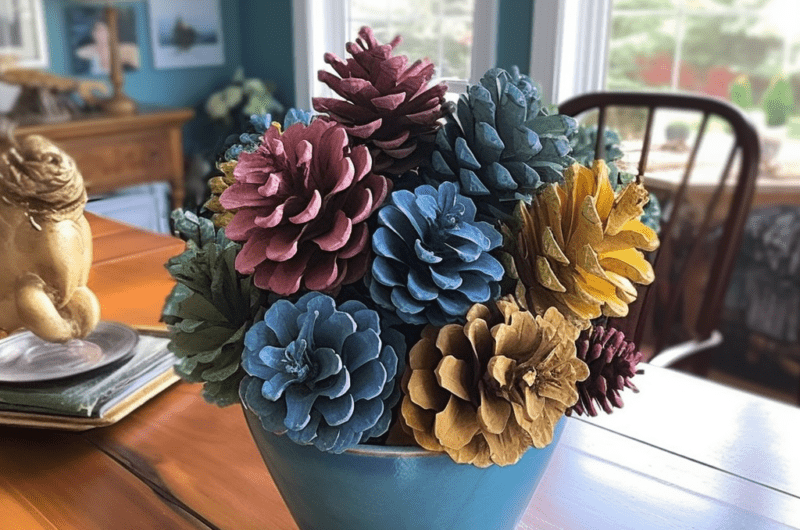
Shake off that image of the regular old brown pine cone and visualize an explosion of colors instead. That’s what we’re going for, a total ???? color-fest that takes the mundane pine cone to a whole new level.
Turn those rustic pine cones into a modern, vibrant centerpiece with a bit of paint and a sprinkle of creativity. Let’s dive right in and create something truly extraordinary! ✨
The Pine Cone Makeover ????????
Make no mistake, this isn’t an ordinary makeover. It’s the DIY equivalent of turning Cinderella into a princess. This humble pine cone is about to be the belle of the ball! ????
Here’s what’s exciting: all you need are some pine cones (duh!), a little bit of paint, and a dash of imagination. Are you ready to roll up your sleeves and get down to business? ????️
DIY Funky Paint Dipped Pine Cones ????
First things first, it’s time to gather all the essentials. ???? Here’s the lowdown on everything you need to bring your funky paint dipped pine cones to life:
Paint Dipped Pine Cones
Difficulty: Easy20
$A fun and colorful DIY project that turns ordinary pine cones into a stunning living room centerpiece.
Equipment
- Tools
Paint brushes
Craft paint
Disposable cups
Newspaper (for covering the workspace)
Pine cones
- Materials
Craft paint
Newspaper
Pine cones
Instructions
- Start by preparing your workspace. Lay down the newspaper to avoid any paint spills. Remember, this is about making a splash of color on the pine cones, not your dining table!
- Pour the craft paint into the disposable cups. Feel free to mix and match colors to your heart’s content. Unleash your inner Picasso and create your own unique palette!
- Now comes the fun part! Dip the pine cones into the paint. Be sure to turn them around to get a full coverage. Once done, let them dry for a couple of hours.
- After the paint has dried, arrange the pine cones into a centerpiece for your living room table. You can also use them in a glass bowl or a decorative plate. The possibilities are endless, so let your creativity flow!
Notes
- Use craft paint instead of regular paint for best results.
- You can use a hairdryer to speed up the drying process.
- Keep the pine cones out of reach of pets and small children.
Frequently Asked Questions
Q: Can I use spray paint instead of craft paint?
A: Sure thing! However, do keep in mind that spray paint might not give as vibrant colors as craft paint would. But hey, if you’re looking for a more subtle look, then go for it! ????
Q: What if I don’t have pine cones?
A: No problem! This DIY project is quite versatile. You can use rocks, seashells, or even old toys. Just make sure whatever you’re using is safe to paint.
Q: Is this project safe for kids?
A: Absolutely! Just make sure they’re supervised while painting. Also, make sure they’re not allergic to the type of paint you’re using.
Q: Can I use glitter or other decorations on my pine cones?
A: Of course! Sparkle away! Just make sure the paint is completely dry before you start adding glitter or any other decorations. Have fun jazzing up your living room! ????