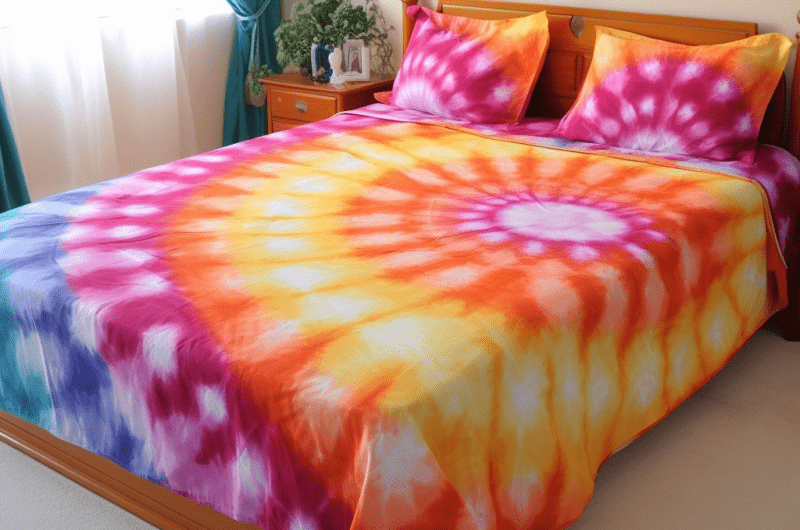
Attention all linen lovers! Today, we are diving headfirst into the whimsical world of bedsheets. Yes, you read that right. ????️ Not just any ordinary bedsheets, though. We’re talking about the perfect DIY bedsheets. The kind that are so magical, you’ll never want to leave your bed again! ????
You might think I’m over the top, but the bedsheets are just that dreamy! Our project today goes beyond the call of ordinary sheet-tucking duty.
Let’s Dive In!
This isn’t just about making your bed. It’s about creating a haven, a cocoon of comfort that feels like a fluffy cloud. I can practically hear the sighs of satisfaction. So, shall we turn that shabby, old bedsheet into a plush dream? Yes, we shall! ????
Get ready to take your bed from blah to voila with some simple tools and a sprinkle of DIY magic. We’re about to make your bed the stuff of Pinterest dreams! ????
A Few Words Before We Start
Here’s a little prelude before we start. You’re probably wondering why I’m making a big fuss over bedsheets. Well, let me tell you – bed sheets are not just a mere sleeping necessity; they’re a statement of personal style and comfort. And as you’ll soon find out, a little DIY magic can make all the difference. ????
I can already hear you say, “But I’m not crafty!” Hold on there, my friend! This project is beginner-friendly and practically fail-proof. Plus, there’s no fun without a bit of experimentation, right? So, let’s give it a shot! ✨
And finally, for those who are feeling a bit lost – don’t worry. We’re all in this together. This guide is going to be your best friend through the journey, providing step-by-step instructions and lots of fun along the way. ????
The Bedsheet Game Begins
So, without further ado, let’s get started on this incredible journey. Roll up your sleeves, gather your tools and materials, and let’s get creative! Let’s show those bedsheets who’s boss! ????
Here’s to beautiful, comforting, and hand-made bedsheets that make going to bed the best part of your day. Sweet dreams are truly made of these! ????
And remember, a well-made bed isn’t just a place to sleep – it’s a place to dream. So, let’s dream big, people! ????
Tie-Dye Bed Sheets
Difficulty: Easy30
minutesA detailed, step-by-step tutorial for creating beautiful, custom tie-dye bed sheets.
Equipment
- Tools
Rubber gloves
Plastic cover
Rubber bands
Large bucket
Stirring stick
- Materials
Fabric dye
Bed sheet
Salt (if required by dye instructions)
Water
Instructions
- Start by laying out the plastic cover on your working area. This will prevent any accidental spills of dye from staining your work surface.
- Prepare the dye according to the package instructions. Most fabric dyes require a mixture of dye and water, and some might even require adding salt.
- Wet the bedsheet and wring out any excess water. The sheet should be damp but not dripping wet.
- Lay out the bedsheet on your covered work area and start folding it according to your chosen tie-dye pattern. Secure the folds with the rubber bands.
- Wearing your rubber gloves, dip the folded bedsheet into the dye mixture. Ensure that all parts of the fabric are submerged in the dye. If not, rotate and adjust accordingly.
- Let the bedsheet soak in the dye for the amount of time recommended by the dye manufacturer. The longer the soak, the darker the color will be.
- After the recommended soak time, remove the bedsheet from the dye bath. Rinse under cold water, still in its folded state, until the water runs clear.
- Finally, remove the rubber bands, unfold the bedsheet and let it dry. After it’s dry, give it a final wash and dry before using.
Notes
- Always wear old clothes when working with fabric dye to avoid any unwanted stains.
- Ensure you are working in a well-ventilated area as some dyes can produce strong odors.
- The final color of the sheet may look different when dry, so don’t worry if it doesn’t look perfect straight out of the dye bath.
Frequently Asked Questions
1. Can I use any fabric dye?
Yes, you can use any fabric dye as long as it’s suitable for the fabric of your bedsheets. Make sure to read the manufacturer’s instructions carefully.
2. What patterns can I create with the rubber bands?
You can create a wide variety of patterns! Experiment with spirals, stripes, circles, or even random tie-dye patterns.
3. What if the color is too light?
If the color is too light, you can repeat the dyeing process for a stronger color. Remember, the longer the fabric stays in the dye bath, the darker it will get.


