Ever wondered what to do with that old lamp that’s been collecting dust in your attic? Well, get ready for a lightbulb moment????!
What if I told you, you can transform that boring old lamp into a stunning, eco-friendly, conversation-starting bird bath? Yes, you heard that right. A bird bath! ????????
The Beauty of Upcycling
Upcycling is a fabulous way to turn your trash into treasure. Plus, it’s excellent for Mother Earth. ????
Creating a bird bath from an old lamp is a fun, simple, and a perfect example of what can be achieved with a little bit of creativity and elbow grease. So, let’s flock towards the process.
Ready to Get Your Feathers Wet?
We’re going to need some fly tools and materials for this project. Make sure you’re ready to dive in. After all, we’re not just winging it here! ????️
Before we begin, don’t forget—safety first! Always be mindful when handling tools and make sure you’re working in a suitable environment. And remember, every bird bath is unique, so don’t be afraid to put your own spin on things! ????️????
Okay, enough chirping. Let’s get started!
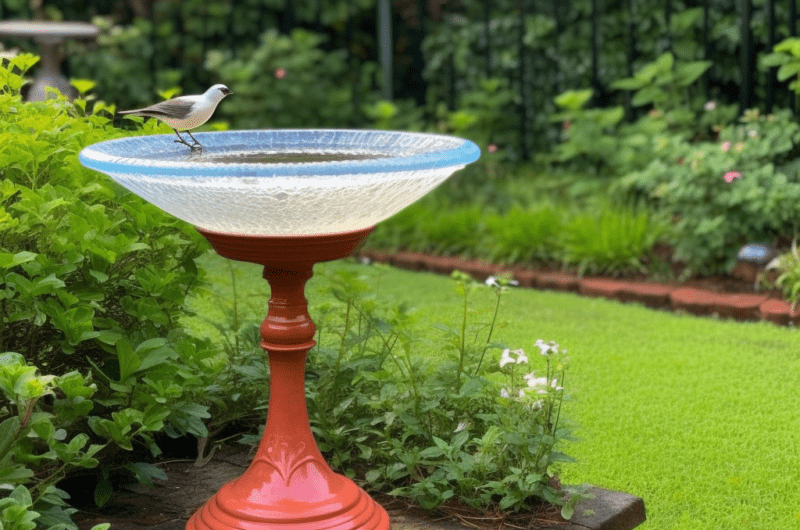
DIY Bird Bath Lamp
Difficulty: EasyAn easy DIY tutorial to transform an old lamp into a beautiful bird bath.
Equipment
- Tools
Screwdriver
Paint (weather resistant)
Brush
- Materials
Old Lamp
Shallow Dish
Silicone Adhesive
Pebbles (Optional)
Instructions
- Begin by disassembling the lamp. You’ll need to remove the wiring, shade, and bulb. The main thing we need is the base.
- Clean the lamp base thoroughly. Make sure it’s free from dust and dirt.
- Give the lamp base a fresh coat of paint. Make sure to choose a weather-resistant variety, as your new bird bath will be exposed to the elements.
- Once the paint has dried, use a silicone adhesive to secure a shallow dish to the top of the lamp base. This will serve as the actual bath where birds can perch and refresh themselves.
- Add some decorative pebbles or stones to the dish if desired. This can make the bath more inviting to birds.
- Allow everything to dry and set completely before moving your new bird bath to its location in the garden.
Notes
- Ensure to place your bird bath in a quiet and safe location.
- Remember to change the water regularly to keep it clean for the birds.
Frequently Asked Questions
1. Is there any alternative to the silicone adhesive?
Yes, you could use a strong outdoor-grade adhesive. However, silicone is preferred because it’s water-resistant and flexible.
2. Can I use any type of paint?
It’s best to use a weather-resistant variety because the bird bath will be exposed to the elements. This will help ensure the longevity of your creation.
3. What can I use as an alternative to pebbles?
You could use decorative glass beads or even small, clean, and safe toys. Remember, the idea is to make it inviting for our winged friends.
4. How often should I change the water in the bird bath?
It’s recommended to change the water every other day to prevent the growth of algae and keep it clean for the birds.